Dreamy Room Level 103
Level 103 guide walkthrough, helping players solve puzzles and explore the wonderful world of Dreamy Room.
Dreamy Room Level 103 Walkthrough Guide
Dreamy Room Level 103 Room Story
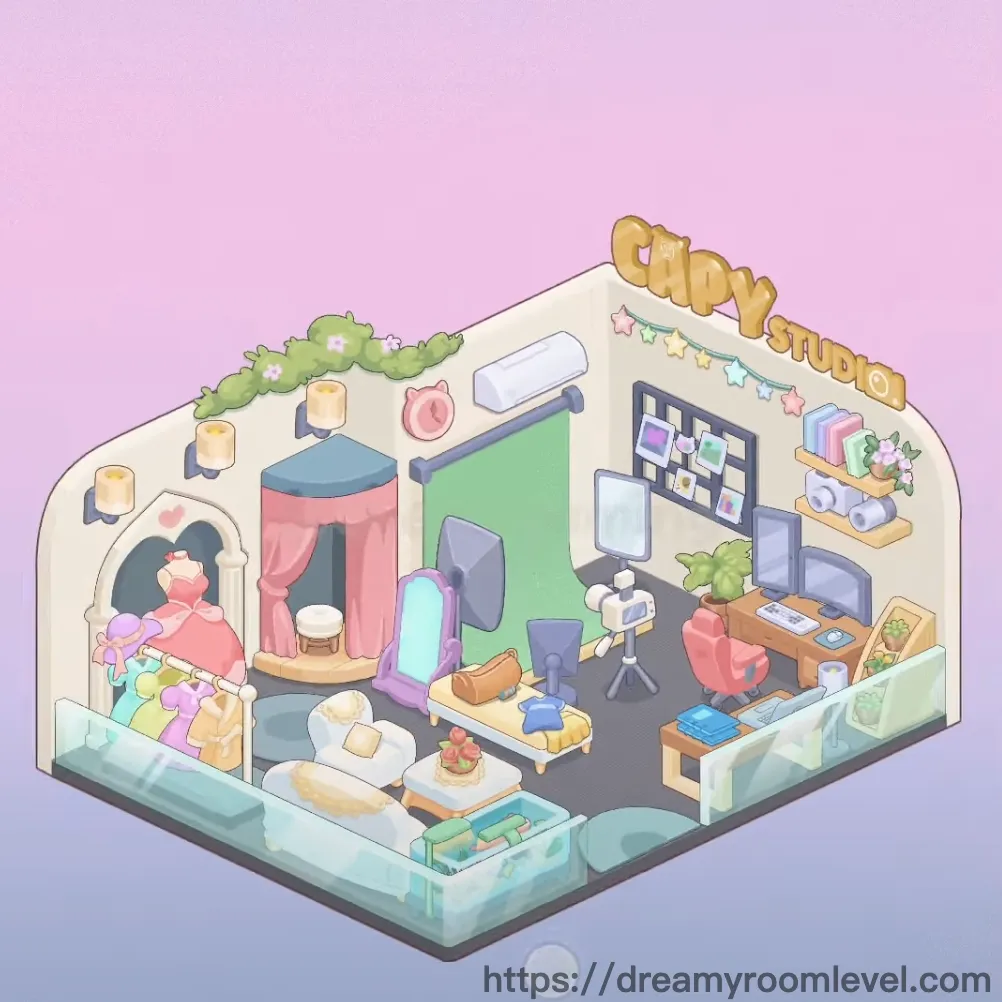
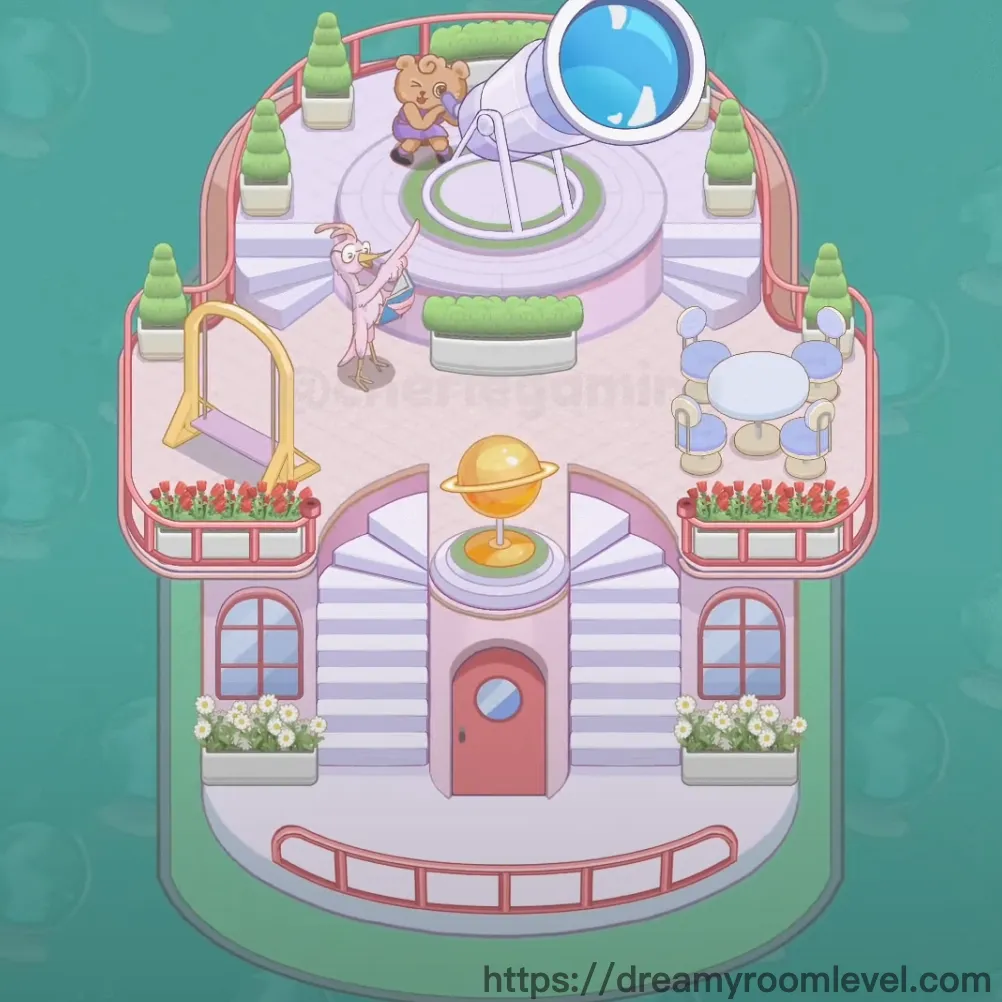
Welcome to Dreamy Room Level 103, where a young astronomer's dream takes shape in this enchanting space-themed sanctuary. Inside, monitors display distant planets while a vintage piano awaits melodies inspired by the cosmos. Outside, a telescope points skyward from the rooftop terrace, where two curious friends - a teddy bear and a thoughtful bird - share quiet moments gazing at the stars. The lotus pond below reflects the infinite sky, creating a perfect harmony between earth and space in this celestial retreat.
Dreamy Room Level 103: Step-by-Step Placement Guide
Step 1. Place Front Door and Entry Windows
Drag the front door to the center-bottom of the building facade. Position the door window in the circular opening above the door. Place the left side window and right side window symmetrically on both sides of the entrance. These elements form the foundation of your Dreamy Room Level 103 building structure.
Step 2. Install Stairs and Balcony Structure
Position the stairs leading from the entrance to the upper level terrace. Attach the balcony platform at the top of the stairs, ensuring it aligns with the upper floor level. Install the red railing around the perimeter of the balcony for safety and aesthetic appeal in Dreamy Room Level 103.
Step 3. Create Pond and Water Features
Drag the pond to the lower front area beneath the pink-framed windows. Place water lilies floating on the water surface. Add lily pads scattered across the pond. Position lotus flowers blooming elegantly on their stems. This serene water feature completes the ground-level landscape.
Step 4. Set Up Outdoor Dining Area
Place the dining table on the right side of the balcony terrace. Arrange the dining chair left, dining chair middle, and dining chair right around the table in proper positions. This outdoor dining setup allows for stargazing meals in Dreamy Room Level 103.
Step 5. Install Telescope and Saturn Ornament
Position the telescope prominently on the upper terrace area, angled upward toward the sky. Place the saturn ornament on its decorative stand near the center-bottom area of the outdoor space. These astronomical elements define the observatory theme.
Step 6. Add Outdoor Swing and Cushion
Install the swing on the left side of the balcony, attached to its yellow frame structure. Place the green cushion as a comfortable seat on the swing bench. This creates a relaxing spot for contemplation.
Step 7. Position Outdoor Characters in Dreamy Room Level 103
Place the bear character near the telescope, sitting in a thoughtful pose. Position the bird character on the left side of the terrace. These friendly characters bring life to your space observatory setup.
Step 8. Add Outdoor Plants and Flower Pots
Position the left flower pot and right flower pot symmetrically at the building's base flanking the entrance. Place top left plant and top right plant in decorative pots on the upper balcony corners. Add green plant left and green plant right to enhance the greenery.
Step 9. Place Bookshelf and Cabinet
Drag the bookshelf to the left wall of the interior room. Position the cabinet as part of the bookshelf unit with its purple countertop surface. These storage pieces anchor the left side workspace in Dreamy Room Level 103.
Step 10. Set Up Computer Desk and Monitors
Place the computer desk against the back wall in the center area. Position the left monitor and right monitor side-by-side on the desk surface, displaying space-themed imagery. This creates the main workstation.
Step 11. Add Office Chair
Drag the office chair in front of the computer desk, ensuring it's positioned for comfortable seating. The pink ergonomic chair completes the workspace setup in Dreamy Room Level 103.
Step 12. Position Living Room Armchairs
Place the left armchair and right armchair symmetrically on either side of the coffee table area in the center of the room. These cozy pink seats create a welcoming conversation space.
Step 13. Place Coffee Table and Globe
Position the coffee table centrally between the two armchairs on the purple rug. Place the globe on top of the glass surface as a decorative centerpiece representing Dreamy Room Level 103's worldly curiosity.
Step 14. Install Piano and Stool
Drag the piano to the right side of the room against the wall. Position the piano stool directly in front of the keyboard. This musical corner adds artistic charm to the space.
Step 15. Lay Purple Rug Foundation
Place the purple rug in the central floor area beneath the coffee table and armchairs. The star-patterned rug defines the living space and adds cosmic flair to Dreamy Room Level 103.
Step 16. Add Welcome Mat and Slippers
Position the welcome mat at the interior entrance near the bottom center. Place the blue slippers and pink slippers neatly on the mat, creating a homey touch.
Step 17. Install Round Windows
Attach the left round window and right round window symmetrically on the upper portions of the side walls. These porthole-style windows enhance the space station aesthetic of Dreamy Room Level 103.
Step 18. Add Window Plants in Vases
Place the left window plant in a blue vase near the left round window. Position the right window plant in a matching blue vase near the right round window. These plants bring natural elements to the cosmic theme.
Step 19. Position Desktop Vases and Flowers
Place the white vase left on the left side of the computer desk. Position the white vase right on the right side of the desk. Add white flowers to create fresh floral arrangements in Dreamy Room Level 103.
Step 20. Add Bookshelf Plant
Place the bookshelf plant on top of or within the bookshelf unit, adding a living green accent to the book collection area.
Step 21. Display Astronaut Figure
Position the astronaut figure prominently on the right side of the room near the piano area. This space explorer statue reinforces the astronomical theme of Dreamy Room Level 103.
Step 22. Hang NASA Decoration
Attach the NASA decoration circular emblem on the wall near the astronaut figure, showcasing authentic space agency branding.
Step 23. Mount Planet Poster
Hang the planet poster displaying Saturn on the wall above or near the computer monitors, adding educational space imagery to Dreamy Room Level 103.
Step 24. Add Stars Decoration and BRAVO Text
Position the stars decoration in the upper right area of the room, creating a celebratory celestial effect. Place the BRAVO text near the stars as a congratulatory message for completing this space-themed sanctuary.
Tips and Important Notes
Important Notes
- The telescope position is crucial in Dreamy Room Level 103 - ensure it's angled correctly upward toward the sky before placing surrounding terrace elements, as repositioning later becomes difficult with characters nearby
- The pond water features have a specific layering order: place the pond base first, then lily pads, followed by water lilies and lotus flowers on top to achieve the proper visual depth
- Round windows can be easily confused with decorative porthole elements - look for the teal circular frames with transparent centers that match the building's curved wall sections
- The purple rug must be placed before positioning the coffee table and armchairs, otherwise the furniture may not align properly with the rug's star pattern
- Monitors require precise placement side-by-side on the desk - if positioned incorrectly, they may block access to placing the desktop vases and flowers
Practical Tips
- When placing the telescope on the narrow terrace area, drag it from the bottom-up direction to avoid accidentally dropping it off the balcony edge
- For the dense dining area setup, place the dining table first as an anchor point, then add chairs in left-to-right order to maintain proper spacing
- The astronaut figure and NASA decoration work best when placed together - position the astronaut first, then attach the NASA emblem on the wall directly behind or beside it for a cohesive display
- Small plants in window vases have tight placement zones - align them with the center of each round window opening and drag slowly until you feel the snap-to-grid effect
- Successfully completing Dreamy Room Level 103 requires placing outdoor elements before indoor items to avoid viewport obstruction - start with the building exterior, then move inside for furniture and decorations