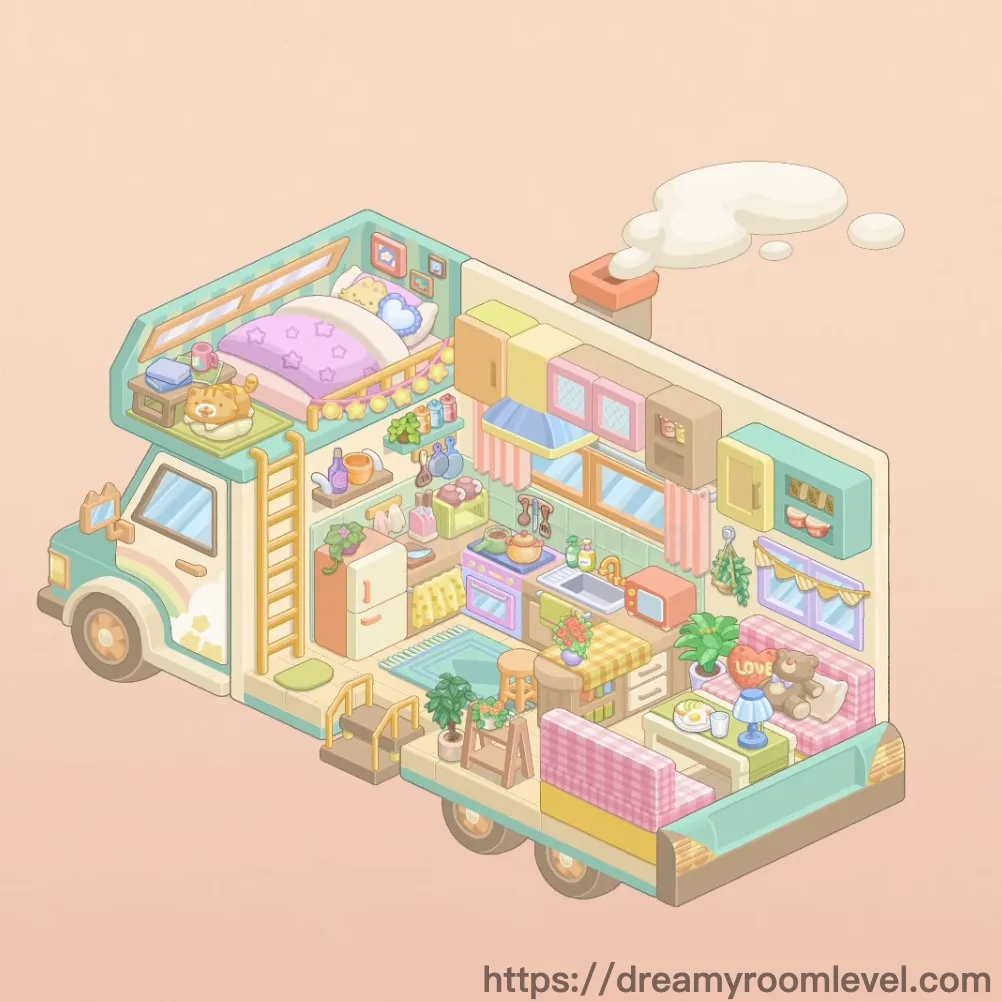
Dreamy Room Level 542
Level 542 guide walkthrough, helping players solve puzzles and explore the wonderful world of Dreamy Room.
Dreamy Room Level 542 Walkthrough Guide
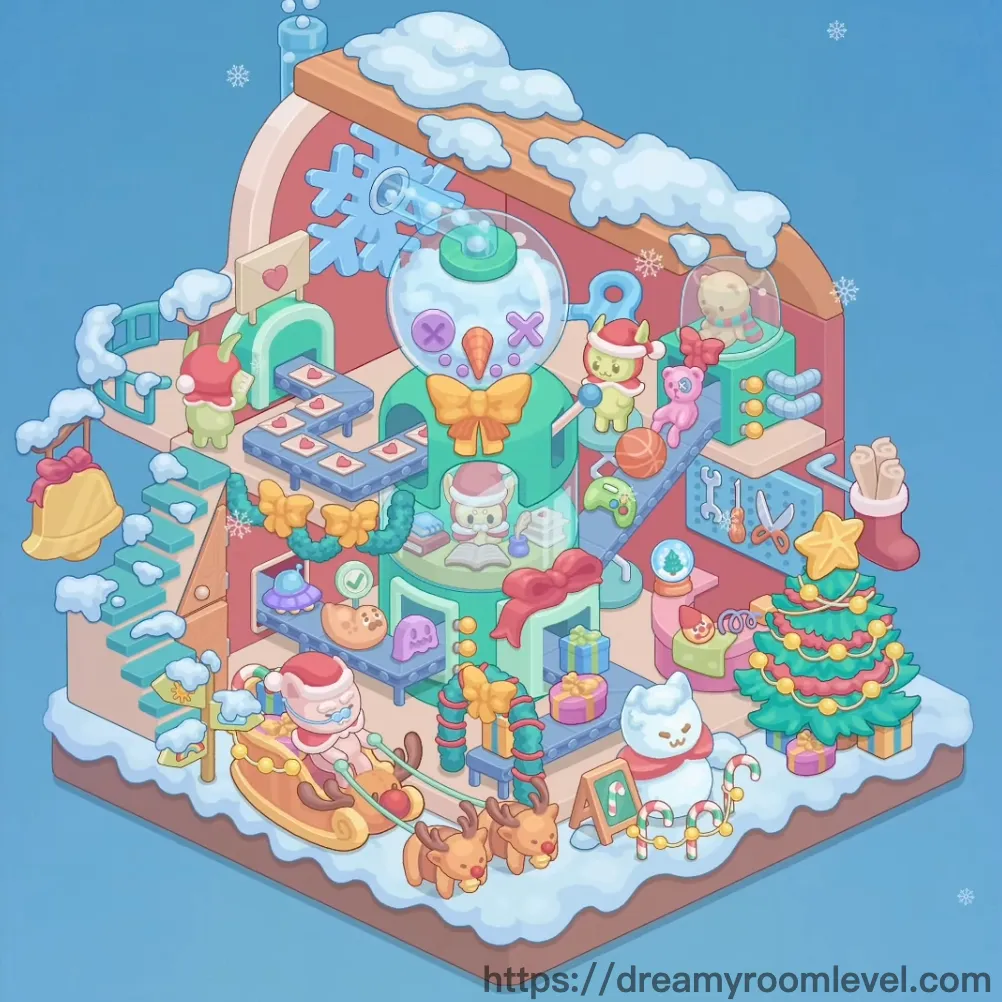
Dreamy Room Level 542 Room Story
Welcome to the magical Christmas Toy Workshop where holiday dreams come true. This enchanting Dreamy Room Level 542 factory belongs to Santa's most talented helpers, where colorful conveyor belts carry freshly made toys past quality control stations. At the heart of the workshop, a giant green machine topped with a cheerful snowman glass dome crafts special holiday presents. Santa Cat oversees operations from his wooden sleigh, pulled by three eager reindeer through the snowy grounds. Pink and green elf workers busily wrap gifts while teddy bears watch from their display domes. From the sparkling Christmas tree to the candy canes scattered about, every corner radiates festive joy as toys roll off the production lines ready to spread holiday cheer around the world.
Dreamy Room Level 542: Step-by-Step Placement Guide
Step 1. Lay Snow Ground Base
Drag the snow ground base to cover the exterior foundation area. This snowy terrain should surround the workshop structure in Dreamy Room Level 542, creating the winter wonderland setting.
Step 2. Install Pink Walls
Position the pink walls to form the workshop interior structure. These walls should create the enclosed factory space that houses all the toy-making equipment.
Step 3. Add Arched Doorway with Light String
Place the arched doorway on the back wall, then hang the yellow light bulb string across the arch. This festive entrance should be the focal point of the workshop in Dreamy Room Level 542.
Step 4. Mount Large Blue Snowflake
Position the large blue snowflake in the center of the arched doorway. This decorative snowflake should be prominently displayed as the workshop's signature winter symbol.
Step 5. Add Cloud Decorations
Drag cloud decoration 1, cloud decoration 2, cloud decoration 3, and cloud decoration 4 around the workshop. Position them along walls and floating above equipment to create a dreamy winter atmosphere.
Step 6. Install Blue Stairs
Place the blue stairs on the left side of the workshop interior. These stairs should connect different levels of the factory floor in Dreamy Room Level 542.
Step 7. Position Wooden Drawer Cabinet
Drag the wooden drawer cabinet to the left exterior area near the stairs. This storage piece should hold workshop supplies and tools.
Step 8. Set Up Blue Conveyor Belts
Position blue conveyor belt 1, blue conveyor belt 2, and blue conveyor belt 3 throughout the factory floor. These production lines should connect different workstations in Dreamy Room Level 542.
Step 9. Install Green Main Machine
Drag the green main machine to the center of the workshop. This large green apparatus should be the heart of the toy production facility.
Step 10. Add Snowman Glass Dome
Place the snowman glass dome on top of the green main machine. This decorative dome should display a cheerful snowman inside, serving as the factory's mascot.
Step 11. Attach Yellow Bow Decoration
Position the yellow bow decoration on the front of the green machine. This festive ribbon should add holiday charm to the central production unit in Dreamy Room Level 542.
Step 12. Place Pink Cabinet Machine
Drag the pink cabinet machine to the left side of the factory floor. This processing station should be positioned near a conveyor belt for efficient toy production.
Step 13. Install Green Cabinet Machine
Position the green cabinet machine on the right side of the workshop. This storage and processing unit should complement the pink cabinet on the opposite side.
Step 14. Add Teddy Bear Glass Dome
Place the teddy bear glass dome on top of the green cabinet machine. This display case should showcase an adorable teddy bear waiting to be shipped in Dreamy Room Level 542.
Step 15. Position Tool Rack
Drag the tool rack to the right side of the workshop near the cabinet machines. This organizer should hold essential toy-making tools.
Step 16. Add Workshop Tools
Place the scissors and wrench on or near the tool rack. These instruments should be arranged neatly for the elf workers to use.
Step 17. Position Santa Cat and Wooden Sleigh
Drag the wooden sleigh to the lower left area on the snow ground, then place santa cat on sleigh inside it. This adorable overseer should be ready to deliver toys in Dreamy Room Level 542.
Step 18. Arrange Three Reindeer
Position reindeer 1, reindeer 2, and reindeer 3 in front of the wooden sleigh. Arrange them in a line to create the classic sleigh team formation.
Step 19. Place Snowman Plush
Add the snowman plush on the snowy ground near the sleigh or workshop entrance. This friendly snowman should greet visitors to the factory.
Step 20. Position Green Elf Workers
Place green elf 1 and green elf 2 near the conveyor belts and machines. These Santa helpers should appear busy with toy production tasks in Dreamy Room Level 542.
Step 21. Add Pink Bear Plush
Position the pink bear plush on a conveyor belt or near the production area. This toy should look ready for wrapping and shipping.
Step 22. Place White Cat Plush
Drag the white cat plush to the snowy ground near the Christmas tree area. This adorable decoration adds warmth to the outdoor setting.
Step 23. Install Christmas Tree
Position the christmas tree on the right side of the snowy ground area. This decorated evergreen should be the centerpiece of the outdoor holiday scene in Dreamy Room Level 542.
Step 24. Arrange Gift Boxes
Place gift box 1, gift box 2, gift box 3, gift box 4, and gift box 5 throughout the scene. Scatter them near the Christmas tree, on conveyor belts, and around the workshop floor.
Step 25. Add Candy Canes
Position candy cane 1 and candy cane 2 around the workshop and snowy areas. These festive treats should be placed decoratively throughout Dreamy Room Level 542.
Step 26. Hang Christmas Stocking
Place the christmas stocking on the right side wall or near the tool rack. This holiday decoration should be hung prominently in the workshop.
Step 27. Add Star Decoration
Position the star decoration on the Christmas tree top or near the main machine. This shining ornament should add sparkle to the festive scene.
Step 28. Place Golden Bell and Ornament String
Add the golden bell near the sleigh or workshop entrance. Position the golden ornament string as decorative garland throughout the scene in Dreamy Room Level 542.
Step 29. Add Snow Globe
Position the snow globe on a surface near the workshop floor or cabinet. This magical decoration should display a winter scene inside.
Step 30. Place Toy Items on Conveyor Belts
Add the game controller, basketball, ufo toy, and alphabet block on the conveyor belts. These toys should appear to be moving through the production line.
Step 31. Add Sweet Decorations
Position the lollipop and around the workshop area. These sweet treats add festive charm to the toy factory in Dreamy Room Level 542.
Step 32. Place Striped Elf Decoration
Add the striped elf decoration near the main machine or conveyor belts. This colorful character adds visual interest to the production area.
Step 33. Add Heart Card and Button Decorations
Position the heart card decoration, , and on conveyor belts or quality control stations. These items represent the sorting process.
Step 34. Install Bubble Pipe
Place the bubble pipe on the rooftop or exterior of the workshop structure. This whimsical chimney should release magical bubbles that float into the winter sky, completing the enchanting atmosphere of Dreamy Room Level 542.
Tips and Tricks
Common Mistakes
- The conveyor belt placement requires careful alignment; if positioned incorrectly, they won't connect properly between workstations in Dreamy Room Level 542.
- Players often overlook the small toys scattered on the conveyor belts; check each production line carefully to ensure all items like the game controller, basketball, and UFO toy are placed.
- The reindeer arrangement in front of the sleigh needs specific spacing; placing them too close together creates an unrealistic formation.
- Cloud decorations floating around the workshop are frequently forgotten; these atmospheric elements should be distributed throughout the scene for the complete winter wonderland effect.
- The glass domes on top of machines require precise placement; the snowman dome goes on the green main machine, while the teddy bear dome belongs on the green cabinet.
Useful Strategies
- Start with structural elements like the snow ground, walls, and arched doorway before adding machinery to establish the workshop's foundation and layout.
- Install all three conveyor belts first as they define the production flow, then position machines and workstations around them for logical factory organization in Dreamy Room Level 542.
- Group similar decorations together during placement; add all gift boxes in one sequence, then candy canes, then other holiday items for efficient completion.
- The outdoor elements like the sleigh, reindeer, snowman, and Christmas tree should be placed after completing the indoor workshop setup to avoid confusion between zones.
- Use the yellow light bulb string on the arched doorway as a visual anchor point; it helps orient the placement of surrounding decorations and machinery.
- Save the small conveyor belt items and floating cloud decorations for last; these details are easier to position once all major furniture and equipment are in place for this festive Christmas workshop scene.