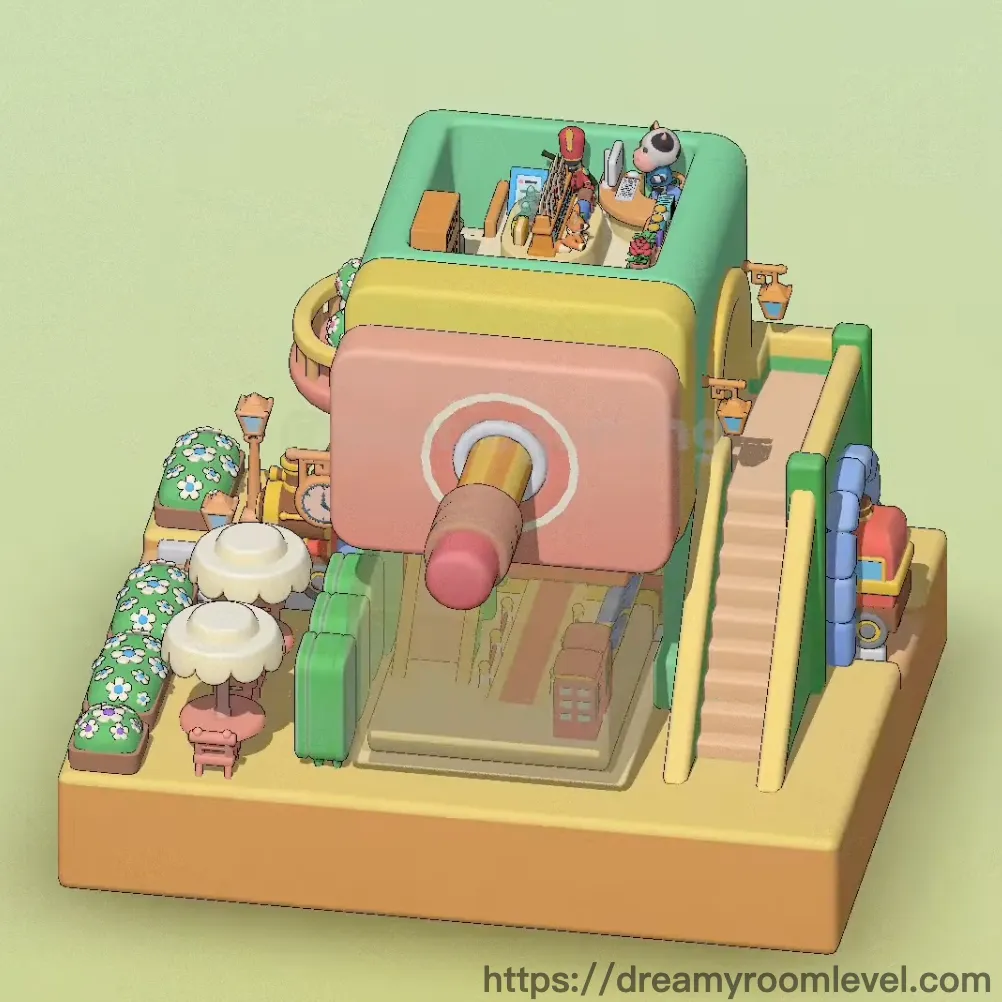
Dreamy Room Level 132
Level 132 guide walkthrough, helping players solve puzzles and explore the wonderful world of Dreamy Room.
Dreamy Room Level 132 Walkthrough Guide
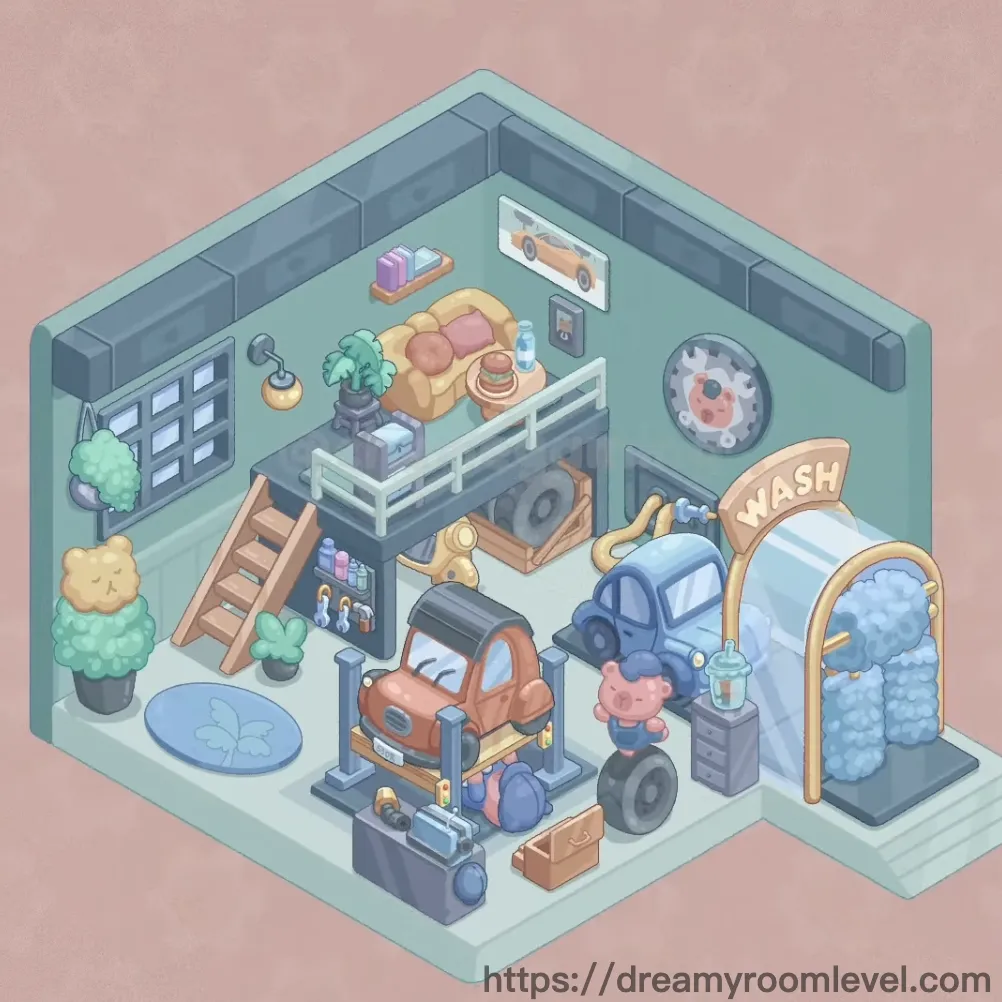
Dreamy Room Level 132 Room Story
Meet Jake, a passionate car enthusiast who transformed his garage into both a professional auto shop and a cozy living space. Every morning in Dreamy Room Level 132, he wakes up on the loft bed overlooking his prized vehicles, ready to restore classic cars while enjoying the comfort of home. The soft blue walls, paired with warm lighting and personal touches like his beloved cat planter, create a perfect balance between workspace and sanctuary.
Dreamy Room Level 132: Step-by-Step Placement Guide
Step 1. Install the Skylight in Dreamy Room Level 132
Drag the skylight to the ceiling's center-upper section. Position it directly above where the loft bed will be placed, ensuring natural light flows into the workspace. The skylight should align with the roof's angle for proper installation.
Step 2. Place the Grey Couch Against the Back Wall
Position the grey couch along the back wall, creating an L-shaped seating area. Place it in the left corner, ensuring it faces the center of the room for optimal viewing of the workspace in Dreamy Room Level 132.
Step 3. Set Up the Orange Car on the Car Lift
Place the orange car on the car lift in the center-front area. The orange vehicle should rest securely on the lift platform, positioned for easy maintenance access. Ensure the car lift is placed first in the main working zone.
Step 4. Position the Blue Truck Near the Wash Station in Dreamy Room Level 132
Drag the blue truck to the right side of the garage, adjacent to the car wash area. Park it facing forward, leaving enough space for the character to move around and access washing equipment.
Step 5. Install the Wooden Stairs with White Railing
Place the wooden stairs along the left wall leading to the loft area. Attach the white railing to both sides of the stairs for safety. The stairs should connect the ground floor to the upper sleeping area in Dreamy Room Level 132.
Step 6. Position the Yellow Armchair in the Living Corner
Drag the yellow armchair to the left side near the couch area, creating a comfortable seating arrangement. Place it facing the coffee table for a cozy reading or relaxation spot.
Step 7. Place the Bed on the Upper Loft
Position the bed on the raised platform above the garage workspace. Place it against the back railing, ensuring it faces the skylight for morning natural light in Dreamy Room Level 132. Add the pink pillow and orange pillow on the bed for comfort.
Step 8. Set the Coffee Table Near Seating Area in Dreamy Room Level 132
Drag the coffee table to the center of the living area, positioned between the yellow armchair and grey couch. Place the water bottle, coffee cup, and plate with food on the table surface.
Step 9. Install the Work Bench and Shelf System
Position the work bench along the back wall near the window. Place the shelf above or beside the work bench, creating an organized tool storage area in Dreamy Room Level 132. Store bottles and books on the shelf.
Step 10. Hang the Window on the Left Wall
Install the window on the left wall above the stairs area. Position it to allow natural light into the workspace while maintaining privacy for the living sections of Dreamy Room Level 132.
Step 11. Mount the Car Poster Above the Couch in Dreamy Room Level 132
Hang the car poster on the wall directly above the grey couch. Center it to create a focal point in the living area, displaying Jake's passion for classic vehicles.
Step 12. Install the Decorative Clock on the Wall
Mount the decorative clock on the right wall near the car wash area. Position it at eye level for easy time-checking while working in Dreamy Room Level 132.
Step 13. Place the Tire Near the Orange Car
Position the tire beside the car lift, leaning against the work area. Place it within easy reach for quick tire changes during vehicle maintenance in Dreamy Room Level 132.
Step 14. Organize the Toolbox and Wrench in Dreamy Room Level 132
Place the toolbox on the ground near the work bench or under the car lift. Position the wrench either in the toolbox or on the work bench surface for quick access during repairs.
Step 15. Set Up the Car Wash Station Equipment
Install the car wash sign above the washing area on the right side. Position the car wash brushes and car wash machine together, creating a complete washing station for vehicles in Dreamy Room Level 132.
Step 16. Lay Down the Blue Rug in the Living Area
Place the blue rug on the floor beneath the coffee table and seating area. Position it to define the living space and add warmth to the garage floor in Dreamy Room Level 132.
Step 17. Position the Cardboard Box Near Storage Areas in Dreamy Room Level 132
Drag the cardboard box to a corner near the stairs or work bench. Place it in an unobtrusive location for storing miscellaneous items or parts.
Step 18. Place Cleaning Tools - Mop and Bucket
Position the mop and bucket near the car wash station or in a corner of the garage. Keep them accessible for cleaning spills and maintaining the workspace in Dreamy Room Level 132.
Step 19. Install the Gas Pump Near Vehicle Area
Place the gas pump on the right side of the garage near the blue truck. Position it for convenient refueling access while maintaining proper safety distance from work areas in Dreamy Room Level 132.
Step 20. Set Up the Drawer Cabinet for Storage in Dreamy Room Level 132
Position the drawer cabinet along the wall near the work bench or under the shelf. Ensure it's accessible for storing tools and maintenance supplies.
Step 21. Add the Standing Lamp for Lighting
Place the standing lamp in the living area corner near the yellow armchair. Position it to provide reading light and ambient illumination for the cozy section of Dreamy Room Level 132.
Step 22. Arrange Potted Plants Throughout the Space in Dreamy Room Level 132
Position the potted tree in a corner near the entrance or window for a natural touch. Place the small plant on the shelf or work bench, and set the cat planter on the coffee table or near the living area.
Step 23. Place the Character in the Workspace
Position the character near the car lift or work bench, showing Jake actively working on vehicle maintenance in Dreamy Room Level 132. Place him in a natural working posture.
Step 24. Hang the Air Freshener Near the Car Area in Dreamy Room Level 132
Attach the air freshener near the car wash station or on the wall above the vehicles. Position it to keep the garage smelling fresh despite the automotive work.
Step 25. Display Toy Cars on Shelving
Place the toy cars on the shelf unit, creating a miniature collection display. Arrange them neatly to showcase Jake's passion for automobiles in Dreamy Room Level 132.
Step 26. Position the Remote Control on Living Area Surfaces
Place the remote control on the coffee table or beside the couch. Keep it accessible for controlling any entertainment devices in the living space of Dreamy Room Level 132.
Step 27. Organize Maintenance Tools on Work Surfaces in Dreamy Room Level 132
Arrange the maintenance tools on the work bench or inside the drawer cabinet. Display frequently used tools for easy access during repairs.
Step 28. Place the Oil Can Near Maintenance Area
Position the oil can on the work bench or beside the car lift. Keep it within reach for quick lubrication tasks in Dreamy Room Level 132.
Step 29. Store Paint Cans in Designated Areas in Dreamy Room Level 132
Place the paint cans on the ground near the work bench or in the storage corner. Stack them neatly for vehicle painting and touch-up projects.
Step 30. Position the Ladder for Upper Access
Lean the ladder against the wall near the loft area or work zone. Ensure it's stable and accessible for reaching high spaces in Dreamy Room Level 132.
Step 31. Hang the Picture Frame on Available Wall Space in Dreamy Room Level 132
Mount the picture frame on any empty wall section near the living area. Position it at eye level to add personal decoration to the garage workshop.
Step 32. Add Cushions to Seating Furniture
Place the cushions on the grey couch and yellow armchair. Arrange them to provide extra comfort in the living area of Dreamy Room Level 132.
Step 33. Stack Magazines on Living Area Surfaces in Dreamy Room Level 132
Place the magazines on the coffee table or shelf. Position automotive magazines to reflect Jake's interests and provide reading material.
Step 34. Organize Cleaning Supplies Near Wash Station
Store the cleaning supplies near the car wash area or under the work bench. Keep them organized for maintaining vehicle and workspace cleanliness in Dreamy Room Level 132.
Step 35. Place Soap Dispenser at Washing Station in Dreamy Room Level 132
Position the soap dispenser beside the car wash brushes and machine. Mount it on the wall or place it on a nearby surface for easy access during vehicle washing.
Step 36. Add the Sponge to Cleaning Area
Place the sponge near the car wash station or in the bucket. Keep it ready for detailed cleaning tasks in Dreamy Room Level 132.
Tips and Notes
Important Notes
- The skylight must be installed before placing the loft bed to ensure proper lighting alignment in Dreamy Room Level 132
- Position the car lift first before placing any vehicles to avoid placement conflicts with surrounding furniture
- The wooden stairs require careful placement to properly connect ground floor and loft areas without blocking workspace access
- Small items like the wrench, oil can, and sponge can be easily missed near larger equipment - check all work surfaces thoroughly
- Ensure the car wash station components are grouped together before placing the blue truck to maintain logical workspace flow in Dreamy Room Level 132
Pro Tips
- Start by placing large structural elements (stairs, car lift, couch) to establish the room's layout before adding smaller details
- When positioning vehicles, drag them slowly near their final spots - the game's snap feature in Dreamy Room Level 132 will automatically align them correctly
- Group similar items together during placement: put all tools near the work bench, all cleaning supplies by the wash station for efficiency
- The loft area works best when you place the bed first, then add pillows and nearby decorations in sequence
- Use the character placement as a reference point - position him last to ensure all work surfaces are accessible in Dreamy Room Level 132
- For wall-mounted items (clock, poster, picture frame), start from the highest position and work downward to avoid overlap issues