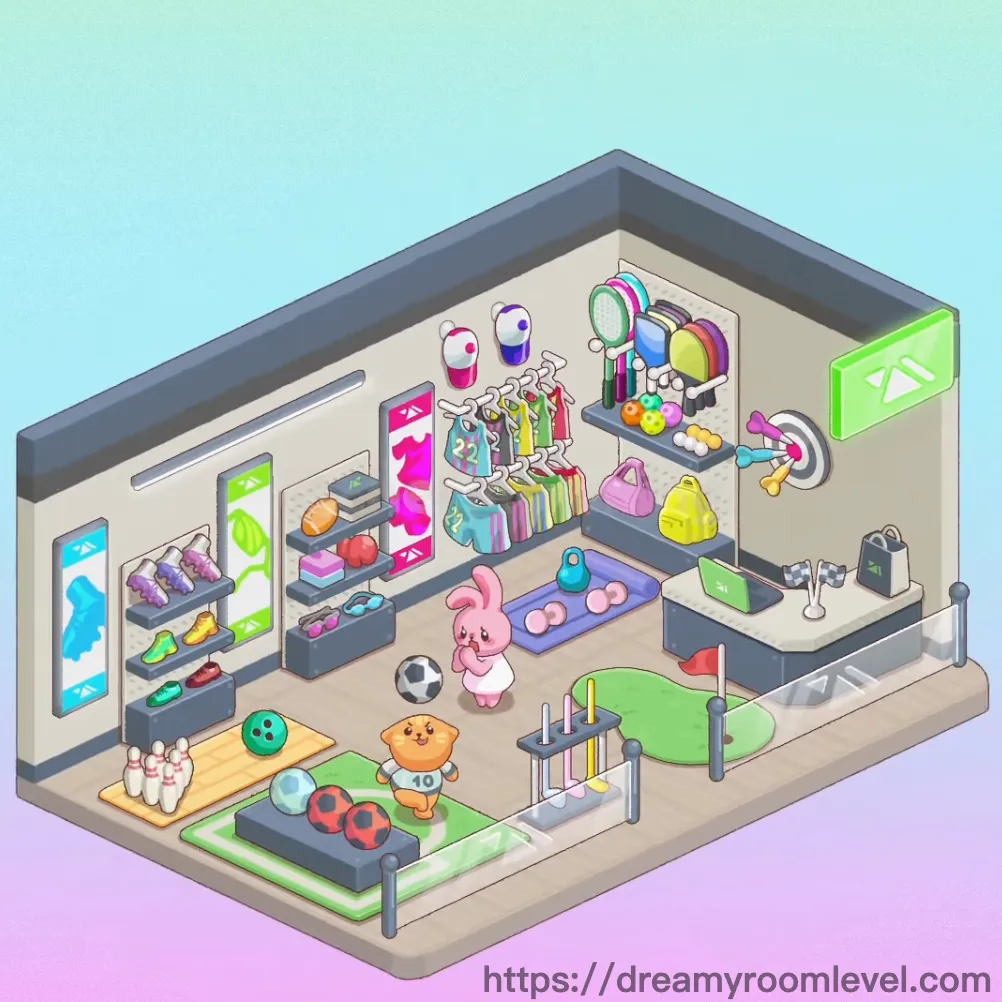
Dreamy Room Level 135
Level 135 guide walkthrough, helping players solve puzzles and explore the wonderful world of Dreamy Room.
Dreamy Room Level 135 Walkthrough Guide
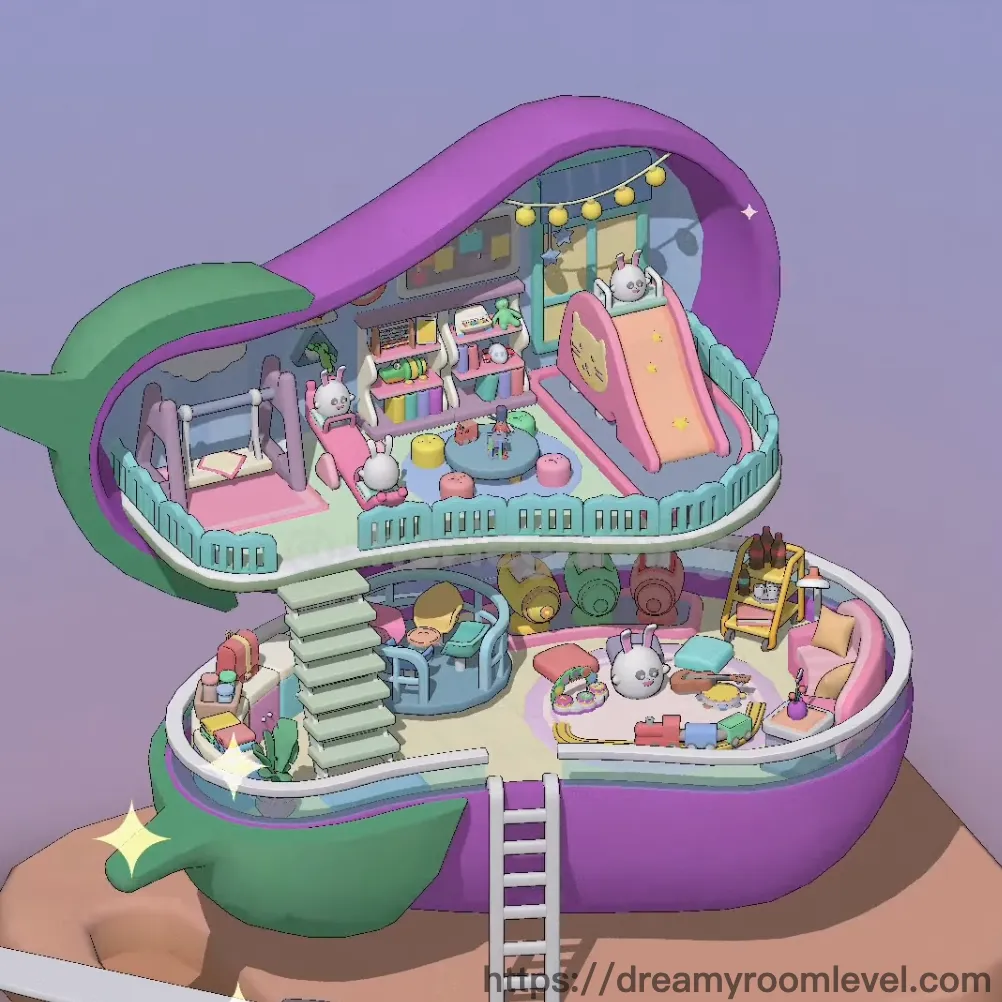
Dreamy Room Level 135 Room Story
Welcome to this enchanting double-decker shell hideaway! This magical space belongs to little Emma, who dreams of having her own secret paradise. The upper level features a cozy sleeping area with a thrilling slide, while the lower floor transforms into a vibrant play zone filled with colorful toys and cushions. Every corner of Dreamy Room Level 135 sparkles with childhood wonder, from the twinkling string lights to the adorable bunny companions keeping watch. This shell-shaped sanctuary perfectly captures the essence of a child's imagination, where playtime never ends and dreams come alive.
Dreamy Room Level 135: Step-by-Step Placement Guide
Step 1. Position the Fence Around the Upper Level
Place the fence along the edges of the upper level to create a safe boundary. This essential safety feature in Dreamy Room Level 135 should form a protective barrier around the sleeping area, ensuring the space feels secure and enclosed.
Step 2. Install the Railing System
Drag the railing to connect with the fence, creating a continuous protective border around the upper deck. Position it carefully along the curved edges following Dreamy Room Level 135 layout design.
Step 3. Set Up the Stairs Connection
Place the stairs structure connecting the lower and upper levels on the left side. This is crucial for Dreamy Room Level 135 as it provides the main access between both floors. Align it with the curved shell opening.
Step 4. Attach the Ladder for Easy Access
Position the ladder near the stairs area as an alternative climbing option. In Dreamy Room Level 135, the ladder should be placed where it naturally connects to the upper platform, typically beside or near the staircase structure.
Step 5. Place the Bed in the Upper Level
Drag the bed to the back left corner of the upper floor. This cozy sleeping spot is the centerpiece of Dreamy Room Level 135's rest area, positioned against the curved wall with enough space around it for movement.
Step 6. Install the Exciting Slide
Position the slide on the right side of the upper level, creating a fun way to descend. Following Dreamy Room Level 135 design, the slide should curve smoothly from the upper deck toward the lower play area.
Step 7. Set Up the Bookshelf
Place the bookshelf against the back wall of the upper level, near the center. This storage solution in Dreamy Room Level 135 keeps stories and treasures organized while adding a colorful backdrop to the sleeping area.
Step 8. Position the Storage Unit
Drag the storage unit to the upper level, placing it near the bookshelf. This practical piece helps maintain organization throughout Dreamy Room Level 135, providing dedicated space for toys and belongings.
Step 9. Add the Dresser to Upper Floor
Place the dresser on the upper level near the bed area. According to Dreamy Room Level 135 requirements, this should sit against the wall, offering convenient clothing storage within reach of the sleeping zone.
Step 10. Install the Wall Shelf
Mount the shelf on the upper level wall above other furniture pieces. This elevated storage in Dreamy Room Level 135 is perfect for displaying decorative items while keeping them safely out of the play area.
Step 11. Create the Circular Seating Area
Position the circular seating area in the center of the lower level. This social hub in Dreamy Room Level 135 serves as the main gathering spot, perfectly sized for playtime activities and relaxation.
Step 12. Arrange the Colorful Cushions
Place the pink cushion, blue cushion, and yellow cushion around the circular seating area. Completing Dreamy Room Level 135 requires distributing these vibrant cushions to create comfortable seating spots throughout the lower floor.
Step 13. Add Floor Cushion for Extra Comfort
Place the floor cushion near the seating area on the lower level. This additional soft seating element in Dreamy Room Level 135 provides extra comfort for floor-based activities and games.
Step 14. Position the Pillow on the Bed
Drag the pillow onto the bed in the upper level. This cozy element completes the sleeping setup in Dreamy Room Level 135, typically placed at the head of the bed for maximum comfort.
Step 15. Place the Rabbit Plushie
Position the rabbit plushie on the upper level, either on the bed or shelf. This adorable companion is a key decorative element in Dreamy Room Level 135, adding charm to the sleeping area.
Step 16. Add the Bunny Decoration
Place the bunny decoration on the upper level near the bed or on the shelf. Following Dreamy Room Level 135 design principles, this cute accent pairs perfectly with the rabbit theme.
Step 17. Set Up the Stuffed Animal Collection
Position the stuffed animal on the lower level among the play items. This cuddly toy is essential for Dreamy Room Level 135's playful atmosphere, typically placed near the seating area or toy collection.
Step 18. Arrange the Colorful Robot Bottles
Place the yellow bottle, green bottle, pink bottle, and brown bottle on the shelf or display area in the lower level. These decorative robot-shaped bottles add vibrant pops of color throughout Dreamy Room Level 135.
Step 19. Install the String Lights
Hang the string lights along the upper level ceiling or railing. This magical lighting element in Dreamy Room Level 135 creates a dreamy ambiance, typically strung across the top deck for enchanting illumination.
Step 20. Add Star Decorations
Place the star decoration on the upper level walls or ceiling. According to Dreamy Room Level 135 layout requirements, these twinkling accents enhance the magical atmosphere, scattered throughout the space.
Step 21. Position the Lamp for Lighting
Place the lamp on the upper level, either on the dresser or bedside. This functional light source in Dreamy Room Level 135 provides focused illumination for the sleeping area during nighttime.
Step 22. Hang the Picture Frame
Mount the picture frame on the upper level wall. This personal touch in Dreamy Room Level 135 displays cherished memories, typically positioned above furniture or near the bed area.
Step 23. Add Wall Decorations
Place the wall decor throughout both levels of the shell structure. Following Dreamy Room Level 135 design principles, these accents should be distributed to add visual interest without overcrowding the walls.
Step 24. Install the Hanging Decoration
Suspend the hanging decoration from the upper level ceiling. This playful element in Dreamy Room Level 135 dangles freely, adding movement and whimsy to the space, usually positioned near the center of the room.
Step 25. Set Up the Small Table
Place the small table on the lower level near the seating area. This practical surface in Dreamy Room Level 135 provides a spot for activities, snacks, or toy display, centrally located for easy access.
Step 26. Position the Round Table
Drag the round table to the lower level play area. Completing Dreamy Room Level 135 requires this additional surface near the seating zone for group activities or displaying decorative items.
Step 27. Place the Mini Furniture Pieces
Arrange the mini furniture around the lower level. These adorable scaled-down pieces in Dreamy Room Level 135 create a dollhouse-like charm, scattered throughout the play area to enhance the magical atmosphere.
Step 28. Add the Climbing Frame
Position the climbing frame on the lower level near the circular seating area. This active play structure is essential for Dreamy Room Level 135 success, providing physical activity opportunities in the play zone.
Step 29. Set Down the Play Mat
Lay the play mat on the lower level floor beneath the play area. This soft surface in Dreamy Room Level 135 defines the play zone while providing cushioning, typically centered in the lower floor space.
Step 30. Spread Out the Rug
Place the rug on the lower level floor, complementing the play mat. According to Dreamy Room Level 135 layout requirements, this adds warmth and texture, positioned to anchor the seating area or play zone.
Step 31. Display the Toy Car
Position the toy car on the lower level floor or shelf. This fun vehicle toy in Dreamy Room Level 135 adds playful energy, typically placed near other toys in the main play area for easy access.
Step 32. Arrange the Toy Blocks
Place the toy blocks on the lower level near the play area. Following Dreamy Room Level 135 design principles, these building toys should be easily accessible, scattered around the floor or stored in a visible spot.
Step 33. Add the Ball to Play Area
Position the ball on the lower level floor among other toys. This classic plaything in Dreamy Room Level 135 encourages active play, typically placed in an open area where it can roll freely.
Step 34. Place the Cactus Plant
Position the cactus on the lower level shelf or table. This cute decorative plant in Dreamy Room Level 135 adds a touch of nature, safely placed out of the main play zone on a stable surface.
Step 35. Add the Plant Pot
Place the plant pot on the lower level, near the cactus or on a different shelf. Completing Dreamy Room Level 135 requires this green accent to bring life to the space, positioned on furniture surfaces.
Step 36. Arrange the Books Collection
Place the books on the bookshelf or nearby surfaces on the upper level. Following Dreamy Room Level 135 design principles, these reading materials should be organized and accessible, creating a cozy reading nook.
Step 37. Set Up Food Display Items
Arrange the banana, hamburger, and drink cup on the lower level table or shelf. According to Dreamy Room Level 135 requirements, these playful food items create a snack area or pretend play zone.
Step 38. Add the Food Tray with Snacks
Place the food tray and snack items on the table in the lower level. This complete snack setup in Dreamy Room Level 135 enhances the play kitchen area, positioned for easy pretend-play access.
Step 39. Position the Decorative Bowl
Place the decorative bowl on the lower level table or shelf. This aesthetic element in Dreamy Room Level 135 adds a finishing touch, typically positioned among other decorative items or serving as a catch-all.
Step 40. Organize Storage Solutions
Position the storage basket, box, and colorful jars throughout both levels. Completing Dreamy Room Level 135 requires these organizational pieces to keep toys tidy, placed on shelves or in corners where they're accessible but unobtrusive.
Tips and Tricks
Common Mistakes to Avoid
- Hidden corners in the curved shell structure can easily hide small items like the toy blocks or cushions. Carefully scan the entire space before declaring Dreamy Room Level 135 complete, paying special attention to areas behind the circular seating and under the slide.
- The upper and lower levels create overlapping visual zones that might obscure placement points. When placing items on the lower level, ensure larger upper furniture isn't blocking your view of the exact drop zone.
- Similar items like the various cushions and bottles can be confused during placement. Double-check that each colored item goes to its designated spot according to the Dreamy Room Level 135 layout to avoid mismatches.
- The fence and railing pieces need precise alignment with the curved edges. Rushing this step can result in gaps or misaligned safety barriers that prevent successful level completion.
Pro Placement Strategies
- Start with structural elements (fence, railing, stairs, ladder) in Dreamy Room Level 135 before adding furniture, as these form the foundation and won't need repositioning later. This prevents having to remove and replace items.
- When dealing with the dense lower level, work from back to front and large to small. Position the circular seating area first, then add tables, then finally scatter smaller items like toys and cushions for optimal placement accuracy.
- The string lights and hanging decorations respond to the "snap-to-ceiling" mechanic. Drag items toward the top edge of the upper level until you feel the magnetic pull, then release for perfect hanging placement.
- For the four colored robot bottles and multiple cushions, use the visual matching technique by identifying each item's unique hue before dragging. This eliminates trial-and-error in Dreamy Room Level 135 and speeds up completion significantly.