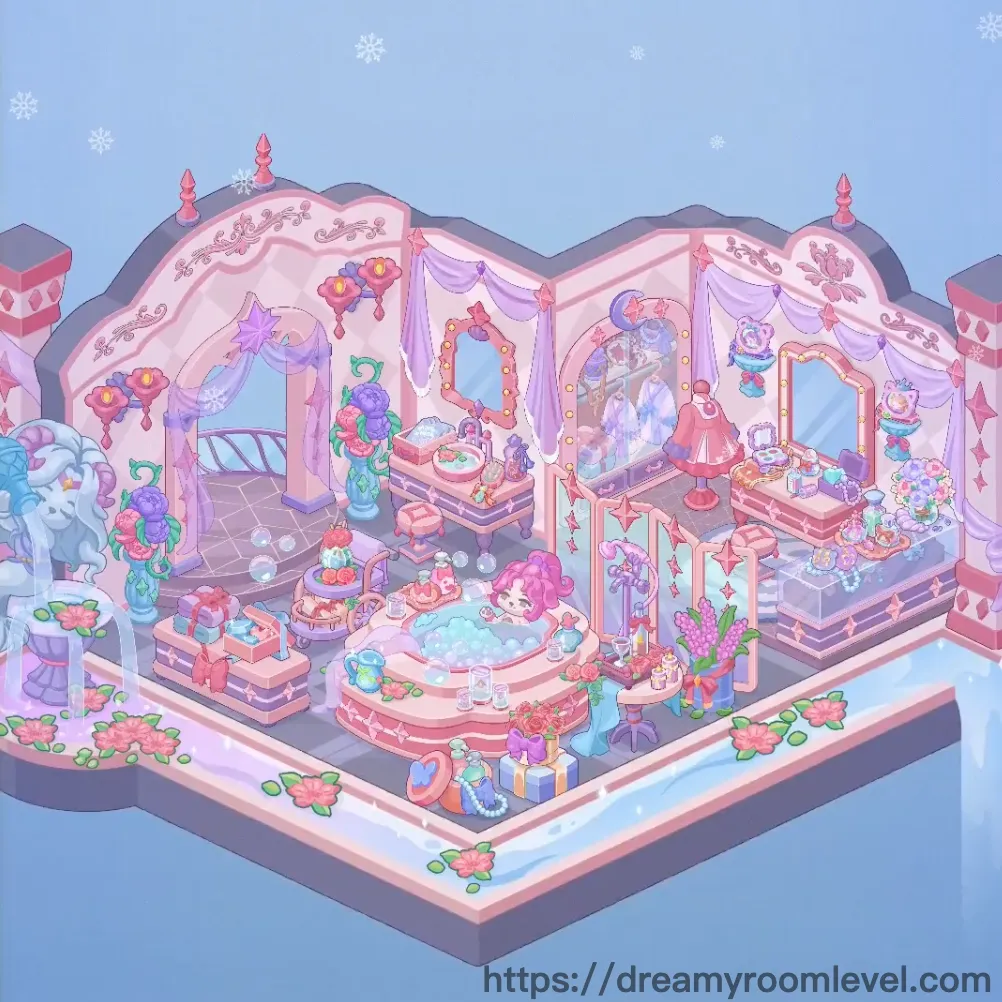
Dreamy Room Level 523
Level 523 guide walkthrough, helping players solve puzzles and explore the wonderful world of Dreamy Room.
Dreamy Room Level 523 Walkthrough Guide
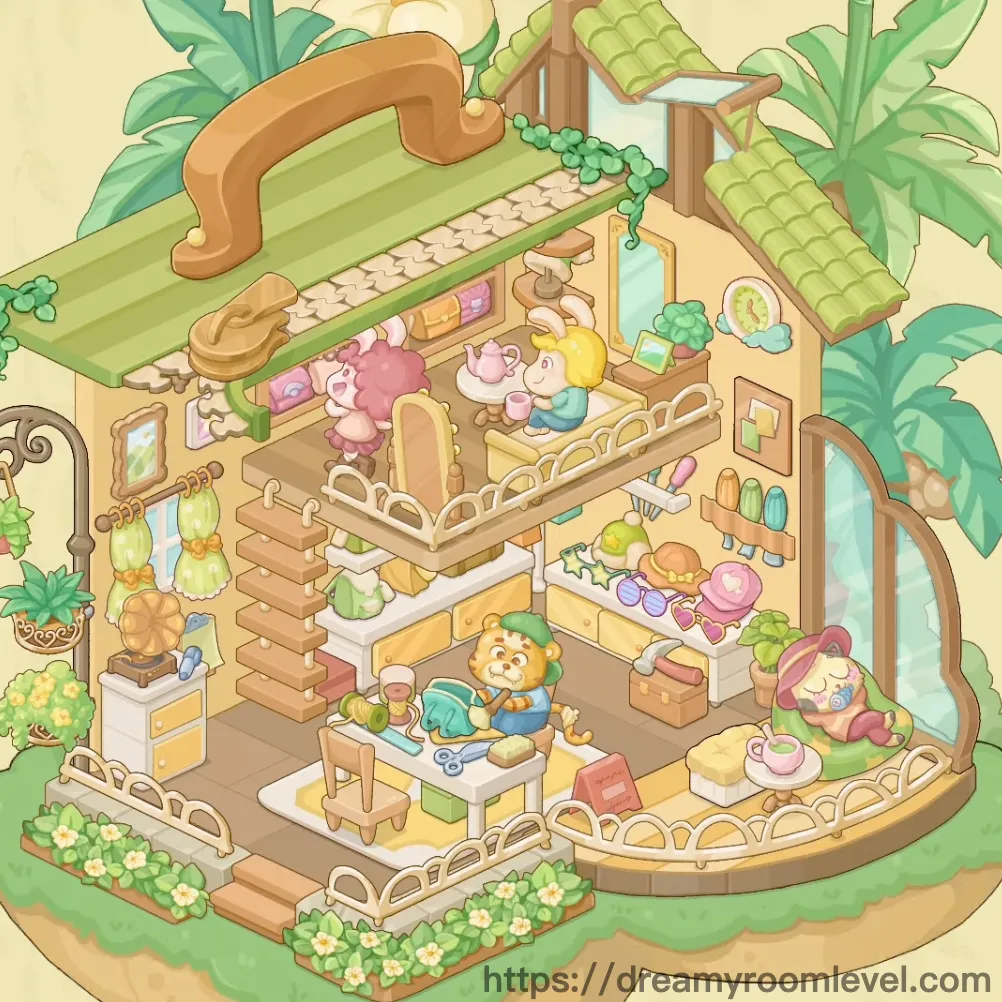
Dreamy Room Level 523 Room Story
Welcome to a charming fashion boutique nestled in a cozy corner where style meets comfort. This delightful shop features a sweet lion shopkeeper in denim overalls enjoying a tea break at the center table. The boutique showcases an array of colorful bags, from pastel pink backpacks to teal shoulder bags, displayed on pristine white shelves. Hanging dresses in soft greens add elegance while floating accessories like scissors and ice cream cones create a whimsical atmosphere. The space is framed by lush green gardens with yellow flowers, white picket fencing, and a sleeping friend in the cozy corner. Whether under a simple brown roof or a decorative green-tiled roof with blooming flowers, this Dreamy Room Level 523 boutique is where fashion dreams come true.
Dreamy Room Level 523: Step-by-Step Placement Guide
Step 1. Lay the Brown Tile Floor
Place the Brown Tile Floor as the foundation covering the entire boutique area. This checkered tile pattern creates the base for the fashion boutique in Dreamy Room Level 523.
Step 2. Build the Yellow Walls
Position the Yellow Wall Left, Yellow Wall Right, and Yellow Wall Back to create the warm interior walls. These sunny yellow walls provide the perfect backdrop for the boutique following Dreamy Room Level 523 design principles.
Step 3. Add Garden Borders
Install the Green Garden Border Left, Green Garden Border Right, and Green Garden Border Front around the boutique perimeter. These green garden areas frame the shop beautifully.
Step 4. Install the Roof Structure
Choose between placing the Roof Structure Brown for a simple flat roof with the White Ball Top Decoration, or the Roof Structure Green Pattern with the Large Yellow Flower Roof. Add Small Green Leaves Top for extra decoration in this Dreamy Room Level 523 challenge.
Step 5. Add Left Wall Decorations
Mount the White Coat Hanger Wall on the left wall. Place the Clothing Rack Left and hang the Green Dress Hanging on it. Position the Storage Cabinet White Left below following Dreamy Room Level 523 layout requirements.
Step 6. Install Display Shelves
Position the White Display Shelf Upper, White Display Shelf Middle, and White Display Shelf Lower on the back wall. Add the Shelf Bracket Yellow for support.
Step 7. Fill Shelves with Bags
Arrange the Yellow Bag Upper Shelf, Pink Bag Upper Shelf, and Brown Bag Middle Shelf on the display shelves. Add the Green Bag Display, Pink Backpack Shelf, and Teal Bag Hanging to create a colorful product display in this level.
Step 8. Add Hat and Accessory Displays
Place the Hat Display Shelf with the Pink Hat and Yellow Hat Stand. Position the Nail Polish Display and Color Palette Shelf following Dreamy Room Level 523 design principles.
Step 9. Add Floating Decorations
Position the Scissors Floating Blue, Ice Cream Cone Floating, Pink Bag Floating Wall, and Teal Crystal Floating around the walls to create a whimsical atmosphere.
Step 10. Set Up the Center Table Area
Place the White Coffee Table in the center. Add the Wooden Chair beside it. Position the Cup on Table and Bread Items Table for a cozy tea time setting in this Dreamy Room Level 523 challenge.
Step 11. Add the Lion Character
Place the Lion Character Orange at the table enjoying a break. Add the Teal Blanket nearby for extra comfort following Dreamy Room Level 523 requirements.
Step 12. Add Tea Service Items
Position the Tea Set Display on the table. Place the Teapot Pink Table and Teacup Pink for the tea service setup.
Step 13. Install the White Fence
Build the White Fence Front with the White Fence Railings along the front edge. Add the Wooden Stairs Left for access to the garden area in this level.
Step 14. Add Fence Decorations
Position the Pink Sheep Character Fence on the fence railing. This adorable character adds charm to the boutique entrance following Dreamy Room Level 523 design principles.
Step 15. Set Up Storage Units
Place the Yellow Drawer Unit against the wall. Add the Storage Box Pink Floor and Storage Box Yellow Bottom for organized storage.
Step 16. Add Right Wall Features
Install the Mirror Wall Right, Towel Rack, and Picture Frame Wall on the right wall. Position the Window Arched Right and Door Green Right in this Dreamy Room Level 523 challenge.
Step 17. Add Sleeping Corner
Create the sleeping area in the bottom right by placing the Bed Bottom Right. Add the Sleeping Character Pink Right resting peacefully following Dreamy Room Level 523 layout requirements.
Step 18. Add Floor Pillows
Scatter the Pillow Yellow Floor and Pillow Pink Floor around the floor for a cozy atmosphere.
Step 19. Add Coat Stand
Position the Coat Stand White in a convenient location for hanging additional items in this level.
Step 20. Plant Garden Flowers
Place the Yellow Flowers Garden Left and Yellow Flowers Garden Right in the garden borders. Add the Flower Pot Bottom Left following Dreamy Room Level 523 design principles.
Step 21. Add Garden Greenery
Position the Green Bushes Left and Green Bushes Right along the garden borders. Add the Green Plant Decorations throughout the garden area.
Step 22. Add Top Leaf Decorations
Place the Leaf Decoration Top Left and Leaf Decoration Top Right at the upper corners for a natural touch in this Dreamy Room Level 523 challenge.
Step 23. Add Final Atmospheric Effects
Scatter the Snowflake Decorations throughout the scene, completing the magical dreamy atmosphere of Dreamy Room Level 523.
Tips and Notes
Important Notes
- The roof structure has two variations - choose either the brown flat roof or the green patterned roof with flower in Dreamy Room Level 523
- The white coat hanger may appear in one version but not the other, so check carefully
- Small floating accessories like scissors and crystals can be easily missed against the yellow walls
- The pink sheep character on the fence is a key difference point between the two versions
- Pay attention to the tea service items on the center table - cups and teapots may vary
- The sleeping character in the bottom right corner requires careful placement
- Garden decorations and flower positions are crucial for completing the boutique atmosphere
Practical Tips
- Start with the floor and walls, then add the roof structure before placing interior elements in Dreamy Room Level 523
- Install all shelving units first before filling them with bags and accessories
- Place the center table and chair as a focal point, then arrange the lion character naturally
- Layer the display shelves densely with colorful bags to create an appealing retail display
- Position floating items at varied heights to create visual interest and whimsy
- The white fence should be placed carefully to frame the front garden area properly
- Ensure the sleeping area in the bottom right has proper bedding and the character is positioned comfortably
- Add garden elements last, working from the green borders inward with bushes and flowers
- The leaf decorations at the top corners help frame the entire scene beautifully
- Check both roof variations carefully as the white ball vs. large flower makes a significant visual difference